Java VisualVM utilizes the so called JMX Technology that is part of the Java Core SE since Java 5. JMX in combination with Java VisualVM enables you to monitor and manage whats going on inside the monitored Java VM.
In the following I will describe how you can connect Java VisualVM to your remote Tomcat 6.0.24 instance over SSH. I currently prefere this approach as it is a pretty secure and straight forward one as well. Note that as far as I know the described approach works for tomcat versions newer or equal 6.0.24 only. You can lookup your tomcat version on an Ubuntu server like this:
root@test-host:~# cd /usr/share/tomcat6/bin/
root@test-host:/usr/share/tomcat6/bin# ./version.sh
Server configuration
First of all you need to download catalina-jmx-remote.jar for your tomcat version. For tomcat 6.0.24 you can download the mentioned jar from here. Afterwards drop the jar into CATALINA_HOME/lib. If you don’t know CATALINA_HOME you can look it up as well with ./version.sh. In my case CATALINA_HOME is located here:
root@test-host:/usr/share/tomcat6/lib#
catalina-jmx-remote.jar will add org.apache.catalina.mbeans.JmxRemoteLifecycleListener to the classpath of your tomcat instance. We will now configure and activate this listener in in the tomcats /etc/tomcat6/server.xml by adding this snippet as a child element to the <Server>-element:
<Listener className="org.apache.catalina.mbeans.JmxRemoteLifecycleListener" useLocalPorts="true" rmiRegistryPortPlatform="10001" rmiServerPortPlatform="10002"/>
Feel free to choose other ports as the ones mentioned above for rmiRegistryPortPlatform and rmiRegistryPortPlatform but make sure that the ports are free. On Ubuntu you can lookup allready used ports for example with this command:
root@test-host:~# netstat -ntlp
The third and last step on server side is to enable the JMX remote monitoring in the JVM itself. This can be achieved by adding this config to CATALINA_HOME/bin/setenv.sh (create the file if it doesn’t exist yet):
JAVA_OPTS="$JAVA_OPTS -Djava.rmi.server.hostname=localhost -Dcom.sun.management.jmxremote -Dcom.sun.management.jmxremote.authenticate=false -Dcom.sun.management.jmxremote.ssl=false"
Make ure setenv.sh has the correct file permissions set. You can set it like this:
root@test-host:/usr/share/tomcat6/bin# chmod 755 setenv.sh
The Server side configuration will take affect as soon as you have restarted your tomcat instance:
root@test-host:~# /etc/init.d/tomcat6 restart
After the restart the ports you have configured in the JmxRemoteLifecycleListener-element (@see server.xml configuration) should be listed within netstat:
root@test-host:~# netstat -ntlp
....
tcp6       0      0 :::10001                :::*                    LISTEN      8916/java
tcp6       0      0 :::10002                :::*                    LISTEN      8916/Java
.....
Client configuration
First of all you need to set up port forwarding for the ports we have configured in the JmxRemoteLifecycleListener-element on server side on our client machine. You can for example use putty for this and configure the tunneling within the “Tunnels” section of your connection.
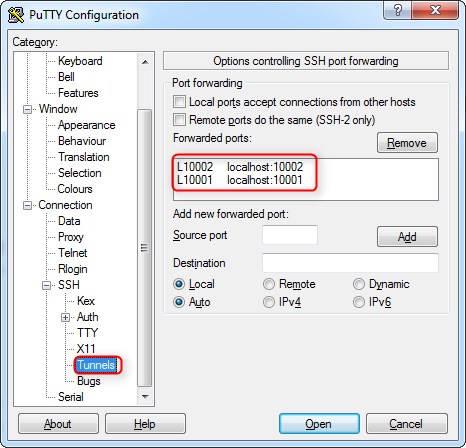
When you have done this save the connection within putty and open it.
After that you need to put the catalina-jmx-remote.jar we already have used during server configuration into VISUALVM_HOME/platform/lib folder as well. In my case this folder was located at:
C:\jdk1.6.0_33\lib\visualvm\platform\lib
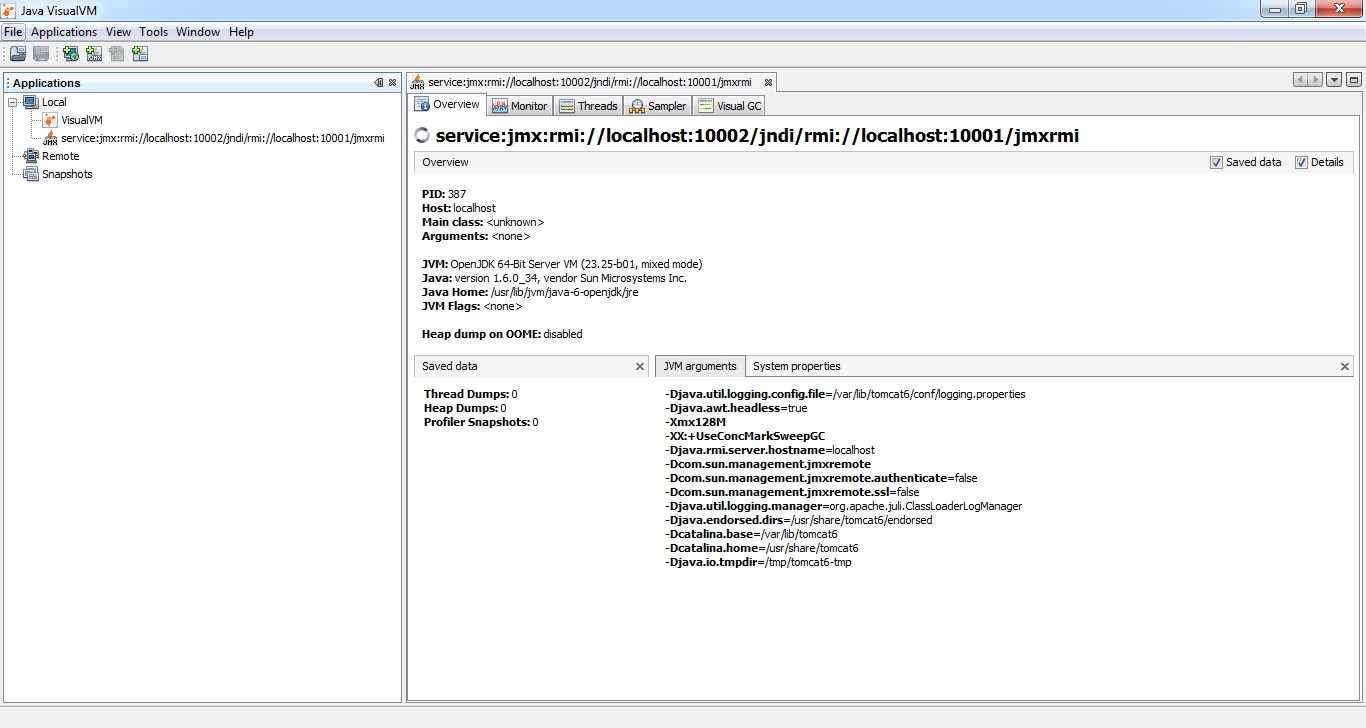
We are nearly finished, open Java VisualVM now. The exectuable is called jvisualvm.exe and is located in the \bin folder of your JDK. In Java VisualVM click on “File” -> “Add JMX Connection …” and paste this into the “Connection” field and hit OK:
service:jmx:rmi://localhost:10002/jndi/rmi://localhost:10001/jmxrmi
Now the connection should be available and ready for monitoring.